
 en
en


Connecting the Jira project
In order to start syncing Jira tasks with tasks in AtTrack, you first need to link the Jira project to the AtTrack project. Only the Administrator and the Project Manager can connect the Jira project with the project.
1. Go to the "Projects" section. In the list of projects, find the desired project and click on the project name.

2. On the project page, scroll down a little - there you will see the block “Integration with Jira”. To start setting up synchronization, you first need to select the Jira account that you want to link to the current AtTrack project. To do this, select an account from the list of added accounts. If you haven't added any accounts yet, you can read about how to do it here.

3. Next, you need to select a project from the list of available projects.
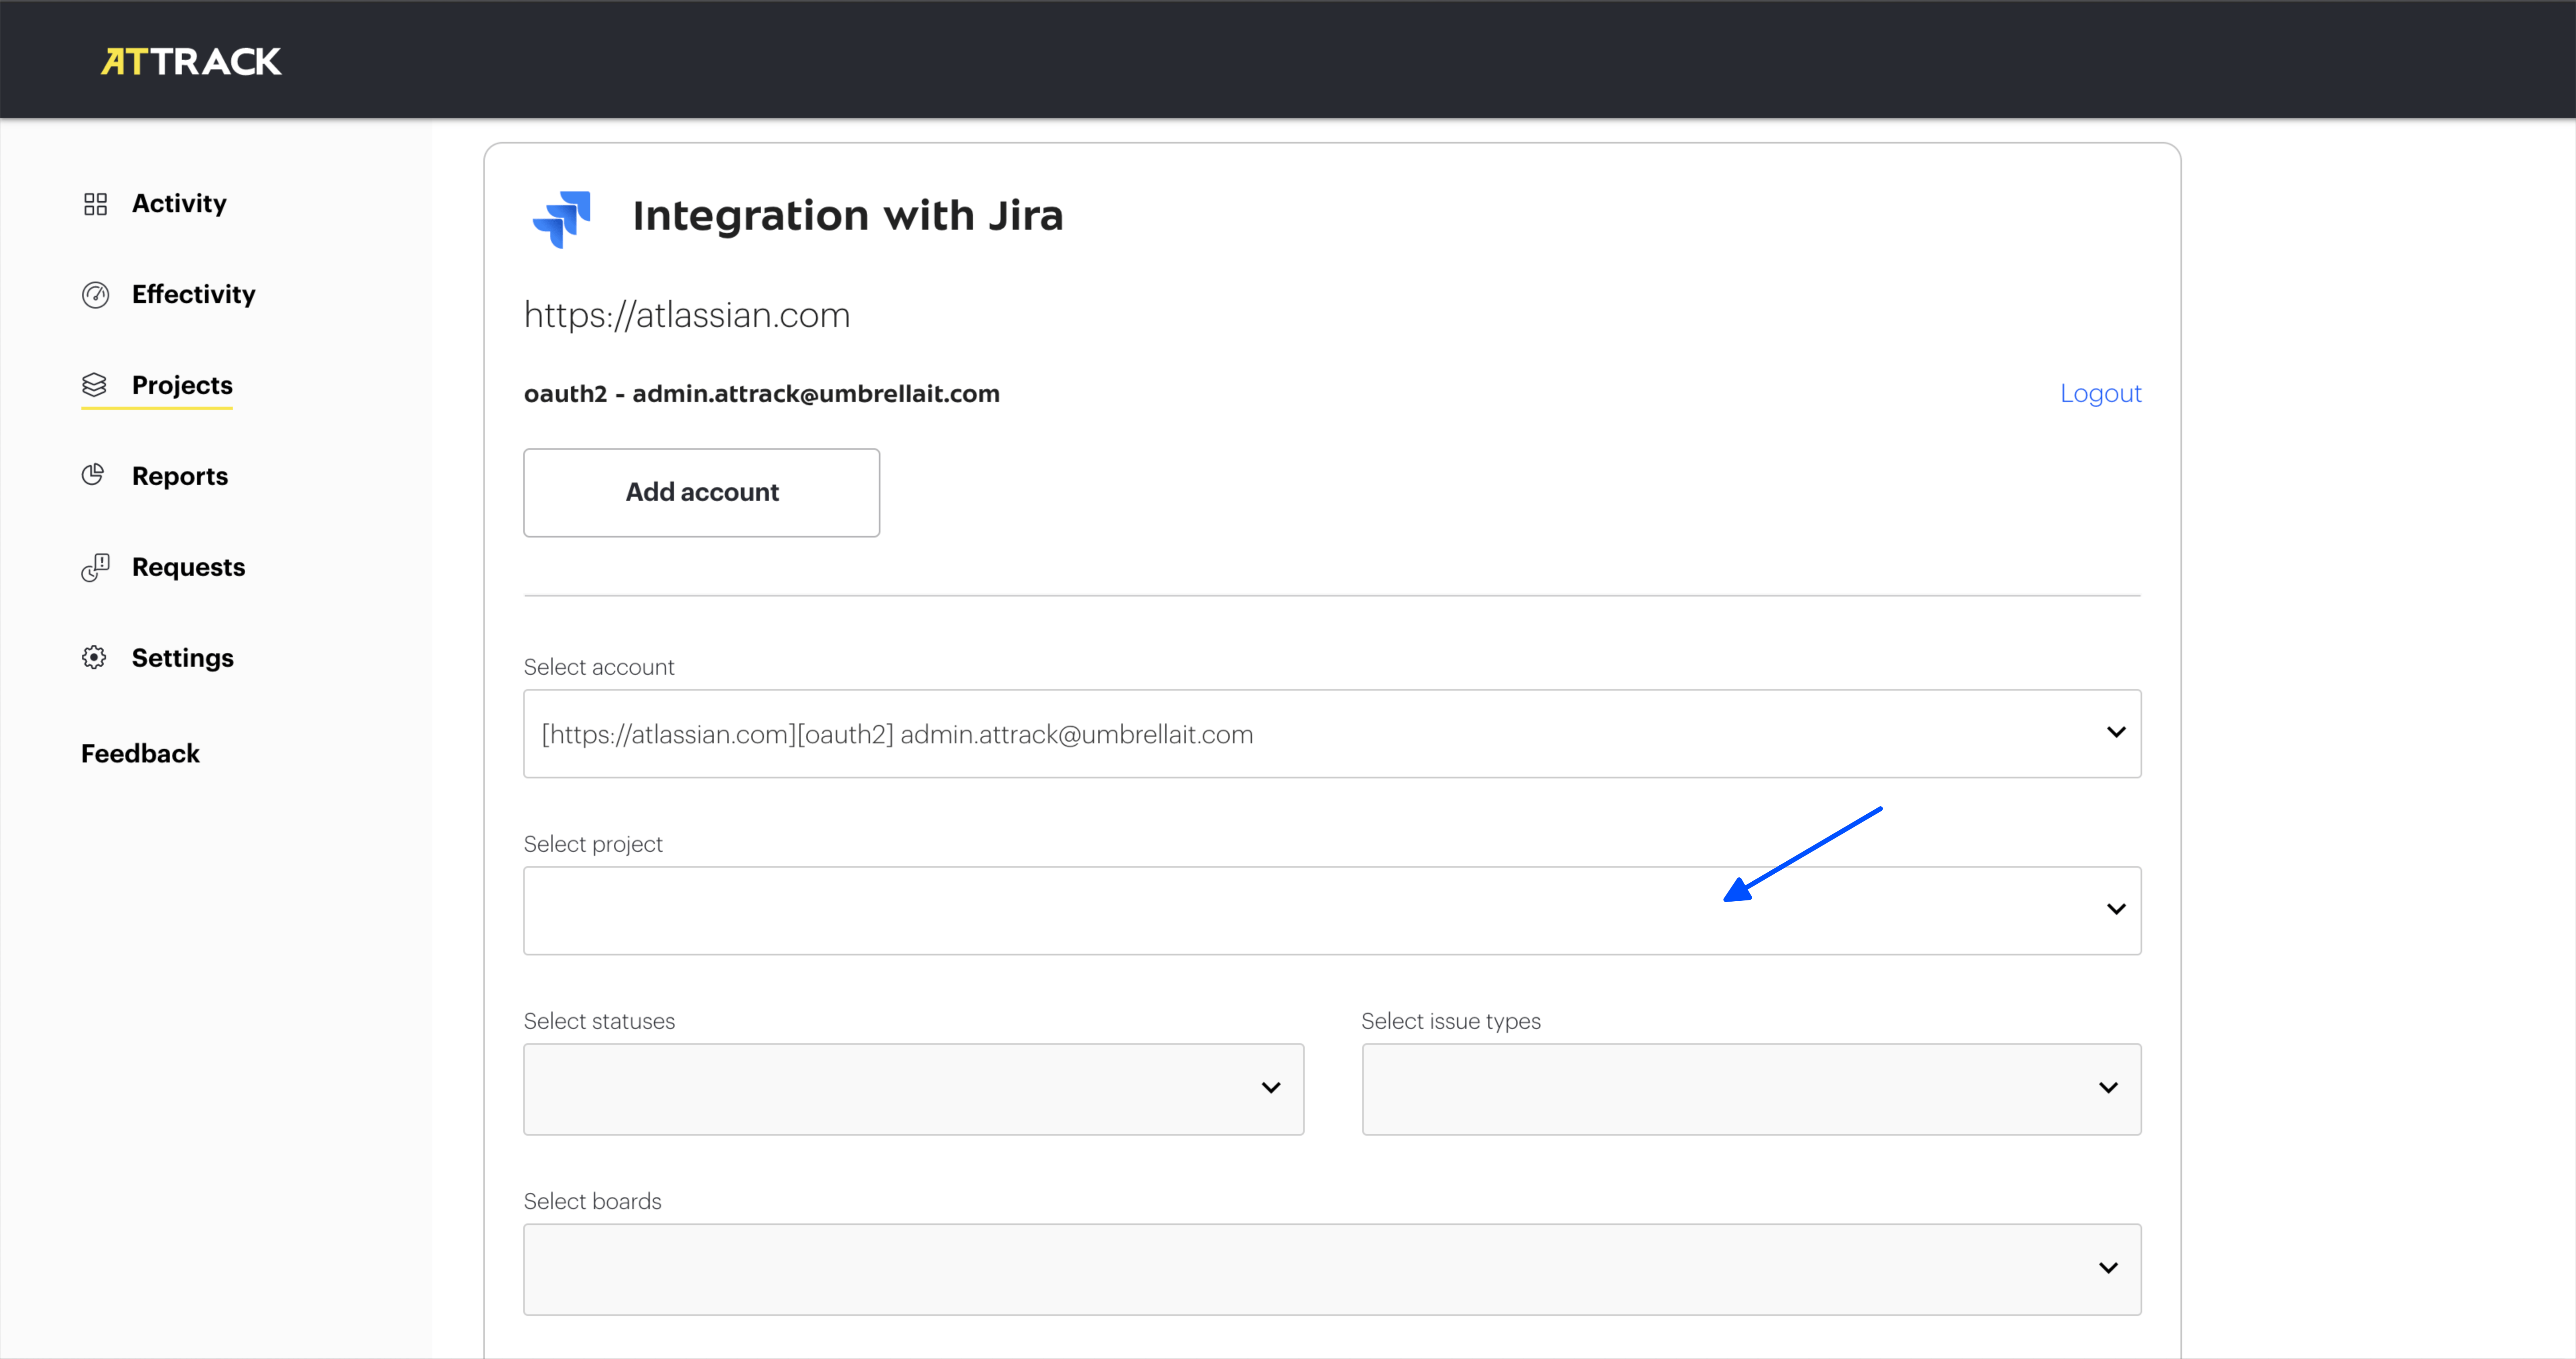
4. Now the fields for selecting statuses, task types, boards, epics, and sprints are available for selection.

5. If necessary, you can only select certain statuses, task types, boards, epics, or sprints.

6. Click on the “Link”button. After that, the Jira project will be linked to the AtTrack project and task synchronization will start.
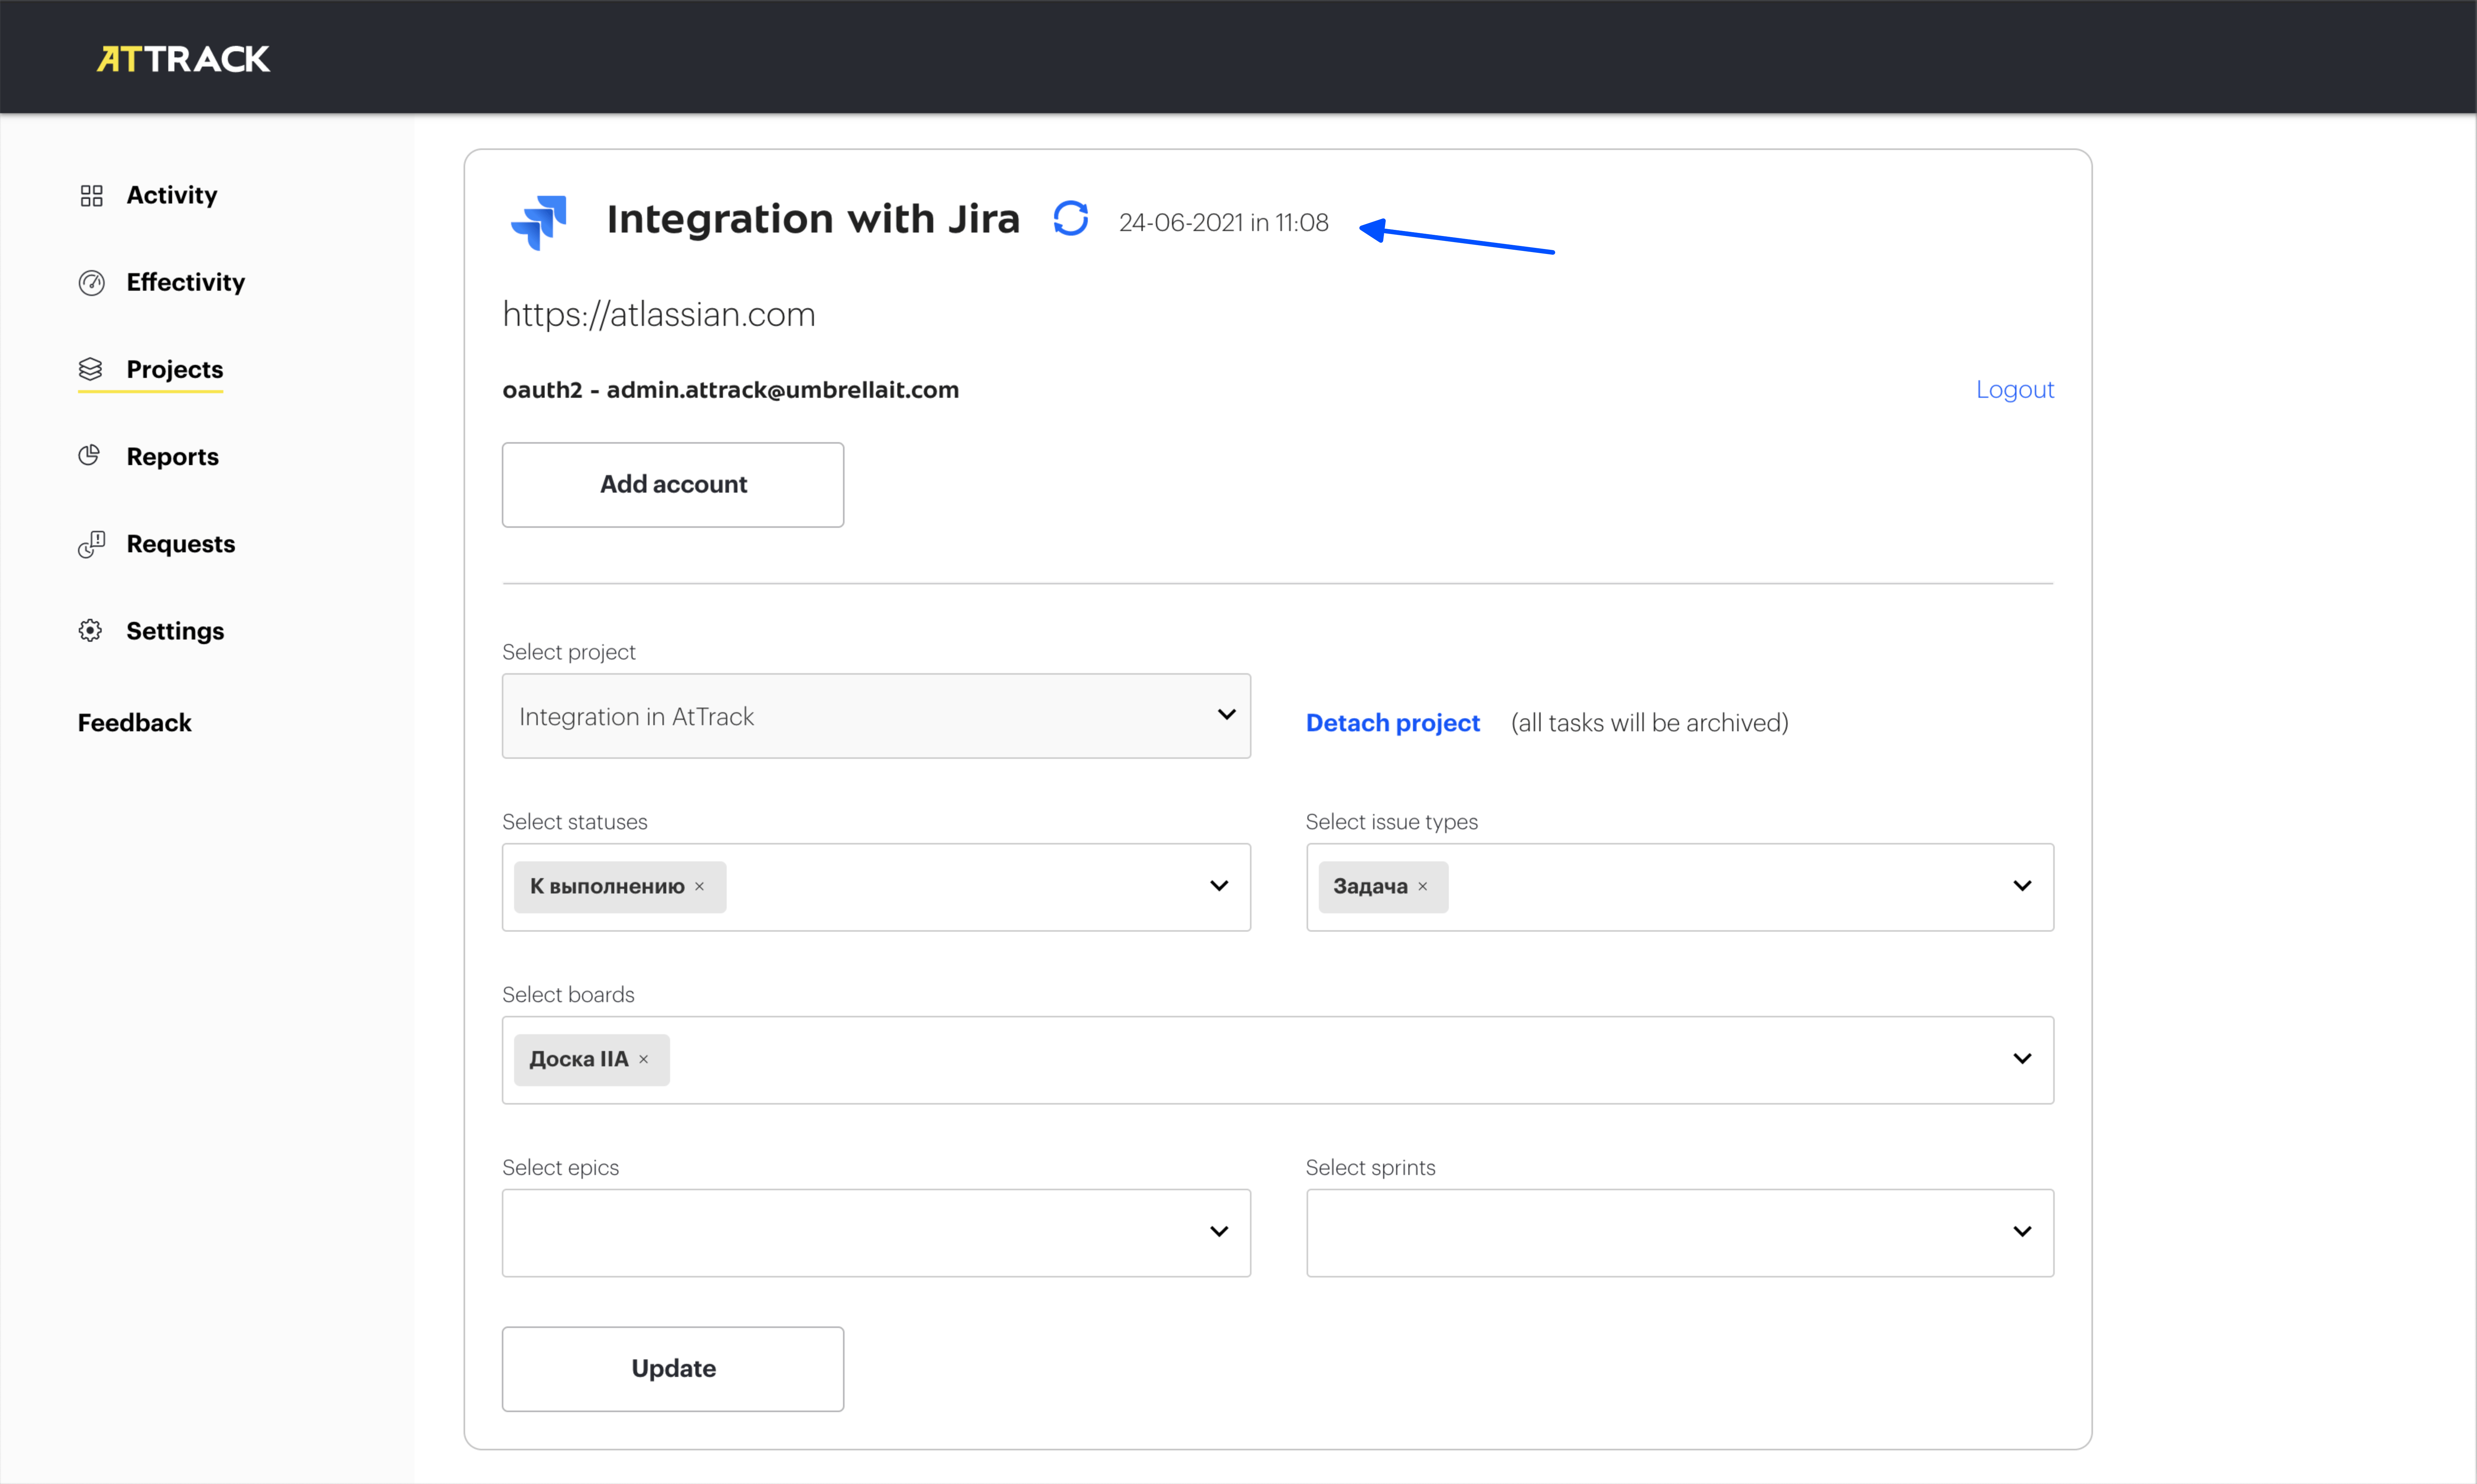
★ You have successfully linked the Jira project to the AtTrack project. Now, in the “Tasks” tab, tasks will be synchronized according to the synchronization parameters you have saved. These tasks can be renamed, archived, and restored only in the linked Jira project, and all the changes made will be displayed in AtTrack automatically.
Possible problems and solutions:
- The changes I made in the Jira project were not displayed in AtTrack.
Start syncing manually. To do this, in the Jira module, click on the sync button located next to the “Jira Integration”header. This button appears after the first synchronization with the board.
- I configured the sync settings incorrectly. How do I change them?
Find out how to change the sync settings here.
- I linked the wrong Jira project. How do I untie it?
You can find out how to untie a Jira project here.